Small Molecule Movies in PyMol

Reading time ~1 minute

I often show molecular structures when I teach the biochemistry section of Integrated Principles of Biology, and the typical 2D representations often obscure some of the key 3D features. With the help of Pymol, ChemSpider, and FFmpeg, I can easily make video of molecular structures where the molecule rotates. This helps demonstrate the inherent 3D properties of the molecules and looks good, too. Here is a quick tutorial.

  • First, choose an interesting small molecule. For this example, I chose Oxytocin, also known as the “love hormone”.
  • Open your browser and go to ChemSpider. Search for Oxytocin.
  • Click the 3D button under the image of the structure of Oxytocin.
  • Click the save to disk button to save the 3D structure file to your disk. I renamed the 388434.mol file to Oxytocin-388434.mol.
  • Start PyMol. Open the 3D structure file (with the .mol extension) in PyMol.

At this point, you can manipulate the structure file as you would any other structure in PyMol. Below I have included a PyMol script that will apply nice styling to the molecule, but you can style the molecule however you like. This script also contains the movie commands, so comment out the movie lines if you just want to play with the molecule styling or you will have to wait while PyMol tries to ray trace every frame.

PyMol has several utilities to make simple movies, and the script below uses the util.mroll utility. If you have a PyMol subscription, you can save the movie directly as an mpeg, but I compiled my own version of PyMol so that function is missing. Nonetheless Pymol will save each frame of the movie as a .png file and I can create a movie from the files using the free program, FFmpeg. There is a learning curve with FFmpeg, but there are lots of resources available. For some FFmpeg encoding tips, see the post by Jess Hyden on Octoshape Support and the FFmpeg wiki. In the PyMol script, below, I have included the FFmpeg settings that I used to generate the movie in this post.
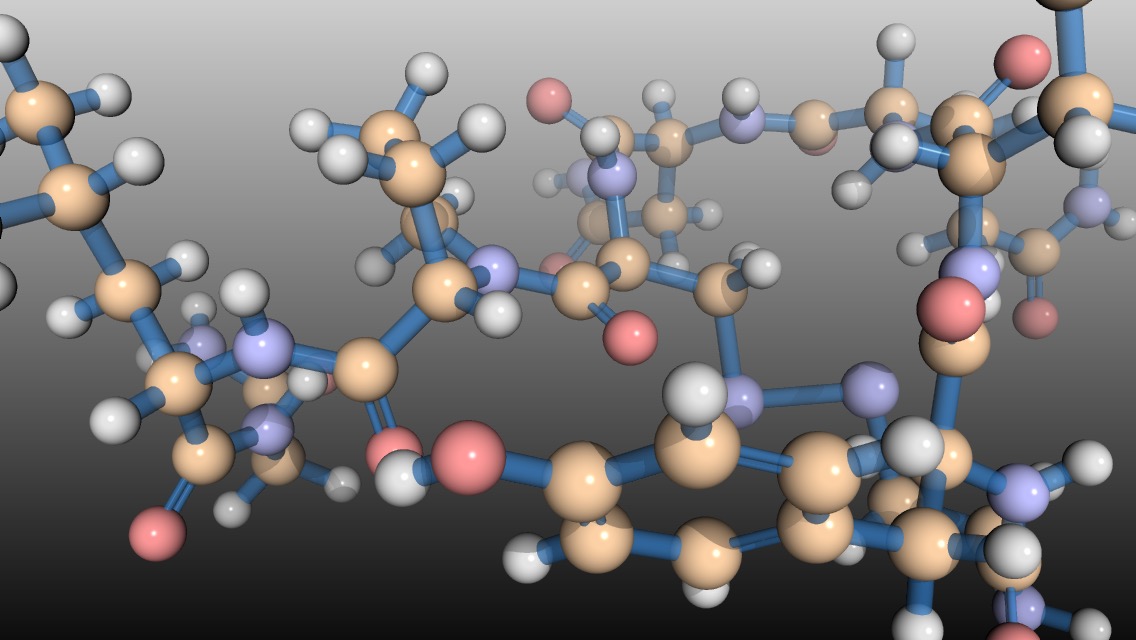
Small molecule rotation movie

# @Oxytocin.txt
# Search the chemical database on [ChemSpider](http://www.chemspider.com).
# Click the 3D button under the chemical image.
# Click the `save to disk` button under the chemical image.
# Open the 3D .mol file in Pymol.
# Uncomment the next line after you have put in the path to your .mol file.
# load path/to/Oxytocin.mol
# for my path:
# load ../1-small-molecule-pdb/Oxytocin-388434.mol
# These viewport settings are for Instagram
viewport 640, 640
create molball, Oxytocin-388434
color lightblue, molball
show spheres, molball
set sphere_scale, 0.25
create molstick, Oxytocin-388434
color skyblue, molstick
show sticks, molstick
set stick_transparency, 0.3
set stick_radius, 0.15
set valence, on
hide everything, Oxytocin-388434
hide lines
hide lines, molball
color hydrogen, elem H and molball
color wheat, elem C and molball
color salmon, elem O and molball
color yelloworange, elem Cl and molball
# grey background gradient
set bg_gradient
set bg_rgb_top, grey80
set bg_rgb_bottom, grey05
# lighting
set specular, 0.25
set spec_power, 300
set spec_reflect, 0.5
util.ray_shadows("light")
set antialias, 1
set orthoscopic, off
set field_of_view, 30
set_view (\
-0.855670094, 0.425180197, -0.294940621,\
0.253521711, 0.841354251, 0.477305144,\
0.451094031, 0.333668411, -0.827715874,\
-0.000005560, -0.000006618, -38.369308472,\
-0.295360446, 0.626138568, 0.559105635,\
27.977766037, 48.759567261, -30.000003815 )
# make a movie
mset 1 x120
util.mroll(1,120,1)
set ray_trace_frames=1
set cache_frames=0
mclear
viewport 640, 640
mpng Oxytocin
# Here are my ffmpeg settings:
# ffmpeg
# -framerate 30 # input frame rate
# -i image%03d.png # image names (image000.png, ..., image999.png)
# -s:v 640x640 # video size
# -c:v libx264 # encoder
# -profile:v main # H.264 profile for video
# -crf 12 # constant rate factor (0 to 23, 0 is lossless)
# -pix_fmt yuv420p # pixel format- changes the rgb from the pngs to yuv
# -preset veryslow # encoding speed (slow but higher quality per file size)
# -tune stillimage # tunes the encoding settings for images
# -r 30 # output frame rate
# output_file.mp4 # movie file name
# all together:
# ffmpeg -framerate 30 -pattern_type glob -i '*.png' -s:v 640x640 -c:v libx264 -profile:v main -crf 12 -tune stillimage -pix_fmt yuv420p -preset veryslow -r 30 Oxytocin.mp4
# Open Terminal.
# Migrate to the directory that contains all the .png files.
# Cut and paste the above ffmpeg command string into terminal to create the .mp4 file.
view raw Oxytocin.txt hosted with ❤ by GitHub

Animating a Molecular Knot

How to make a molecular knot movie using PyMOL Continue reading

Making a Protein Conformation Change Movie

Published on March 21, 2016